
Bookings · The «Book an appointment» button in the chat
How does a customer book an appointment from inside the chat?
The assistant never books by guesswork: a button opens reliable booking steps right inside the chat.
Who this is for: Owner & manager · Your customers
Where: Sidebar → Train your assistant → Reply paths → «Add a button to the main menu» → «When the customer taps the button» → «Book an appointment» · and in the chat → «Book an appointment»
Steps
- In «Reply paths», press «Add a button to the main menu», and under «When the customer taps the button» choose «Book an appointment».
- Under «Service (optional)», choose a service or leave «— Customer chooses the service —», and add a «Message before booking (optional)» if you like.
- Pick a suitable icon (such as «Book an appointment» in the «Appointments» category), then press «Save»; the button appears to customers in the chat.
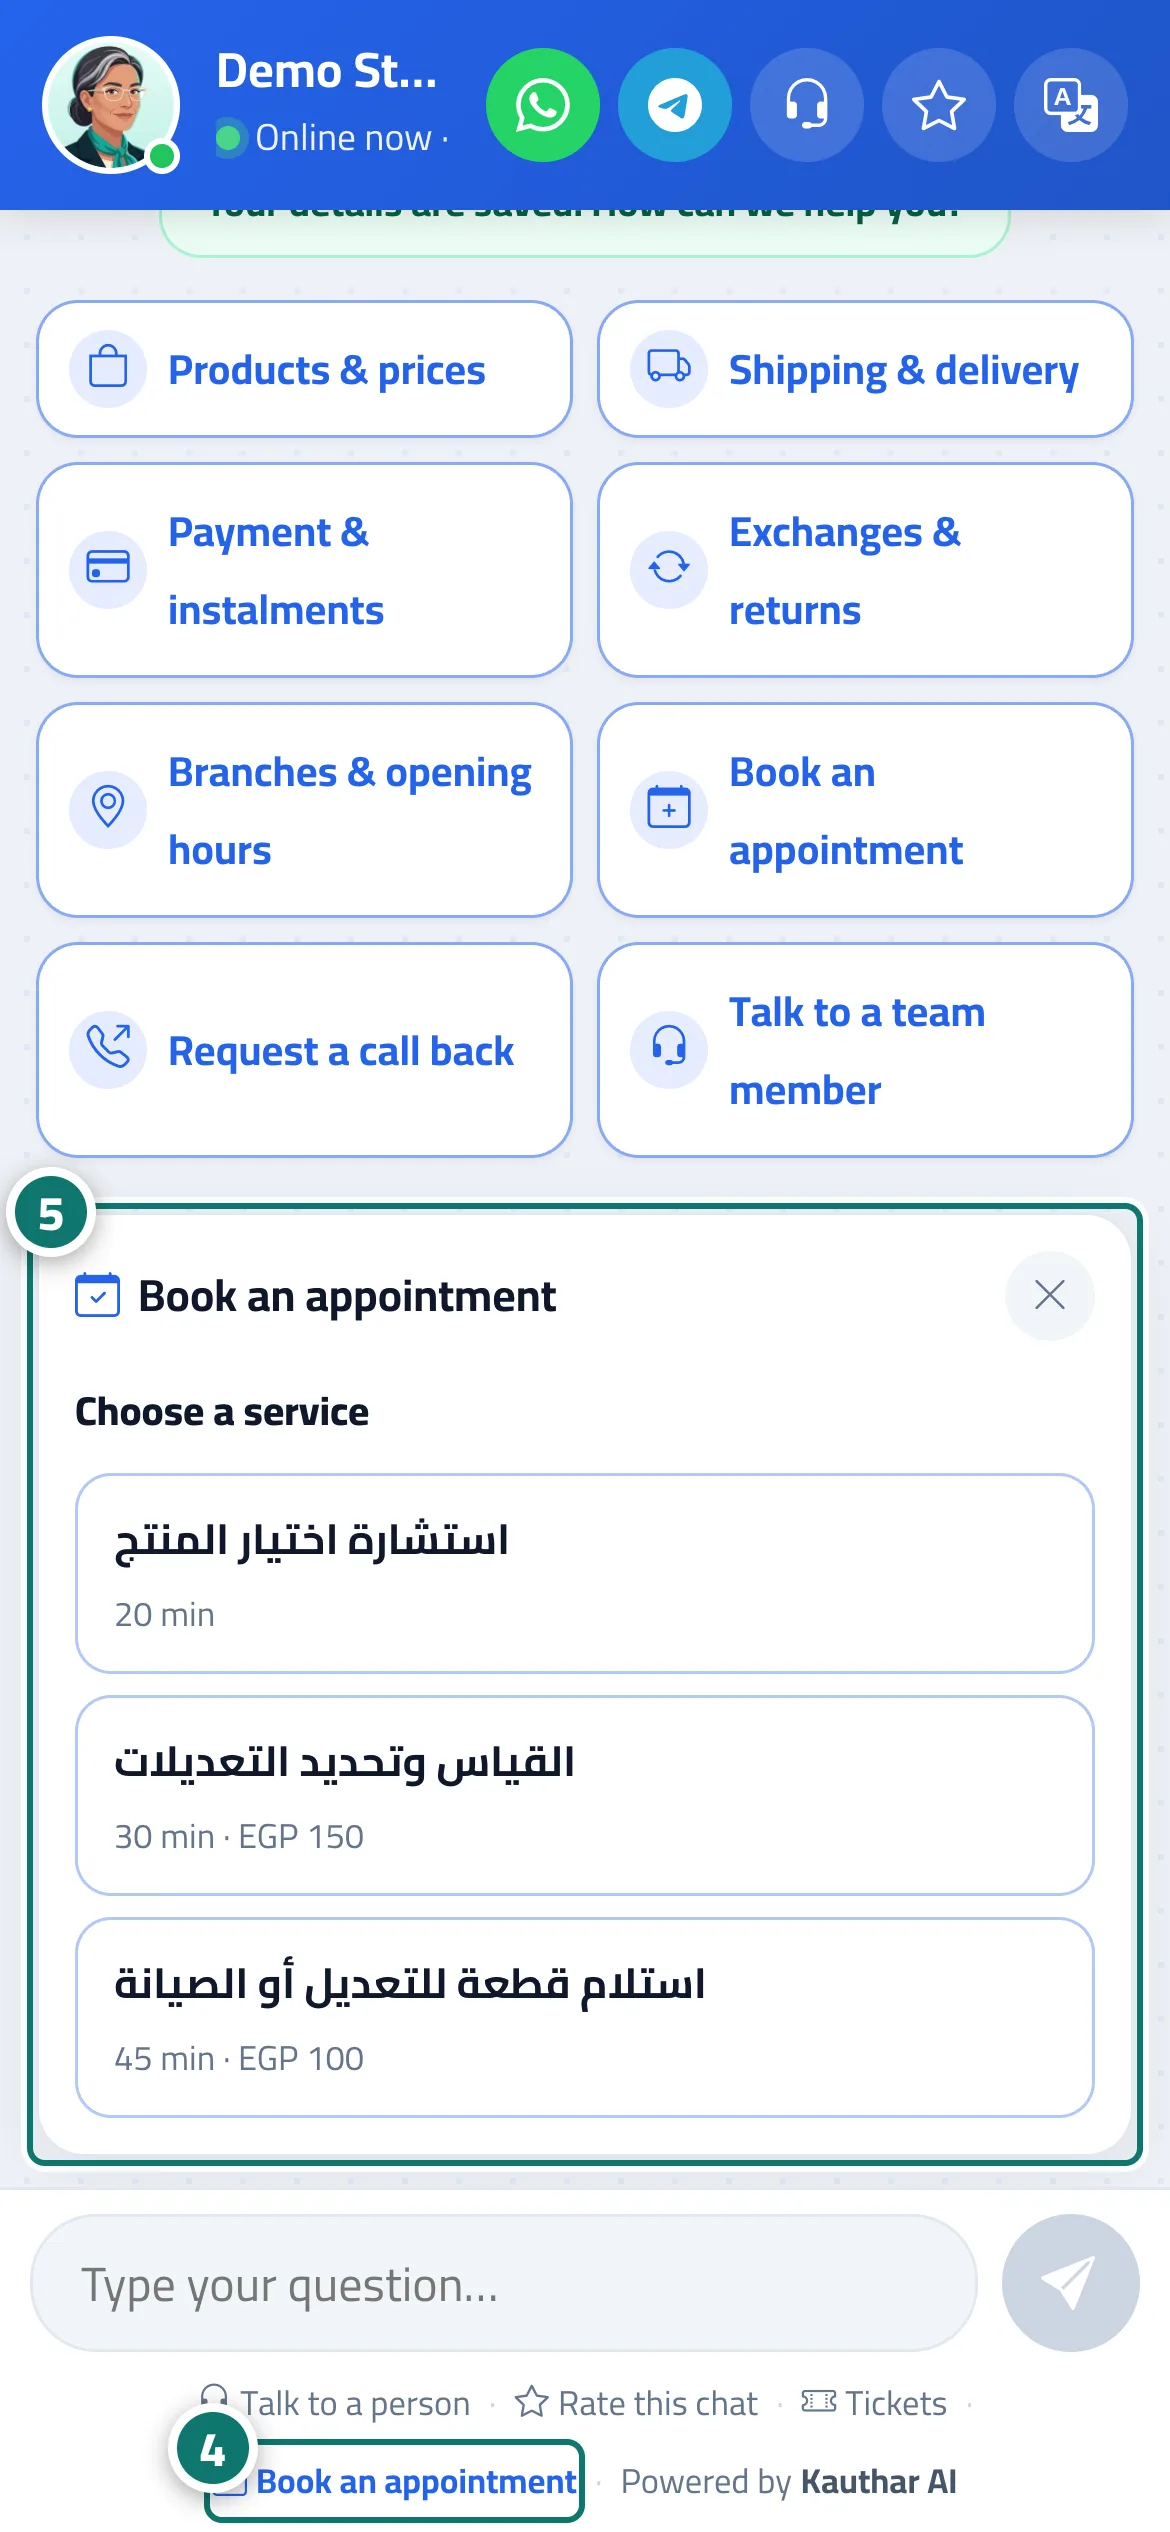
- The customer taps the button in the menu or the «Book an appointment» link at the bottom of the chat window. Number 4 on the picture
- They choose the service, provider, day and time with buttons, then enter their name and phone number and press «Confirm booking». Number 5 on the picture
Steps
- In «Reply paths», press «Add a button to the main menu», and under «When the customer taps the button» choose «Book an appointment».
- Under «Service (optional)», choose a service or leave «— Customer chooses the service —», and add a «Message before booking (optional)» if you like.
- Pick a suitable icon (such as «Book an appointment» in the «Appointments» category), then press «Save»; the button appears to customers in the chat.
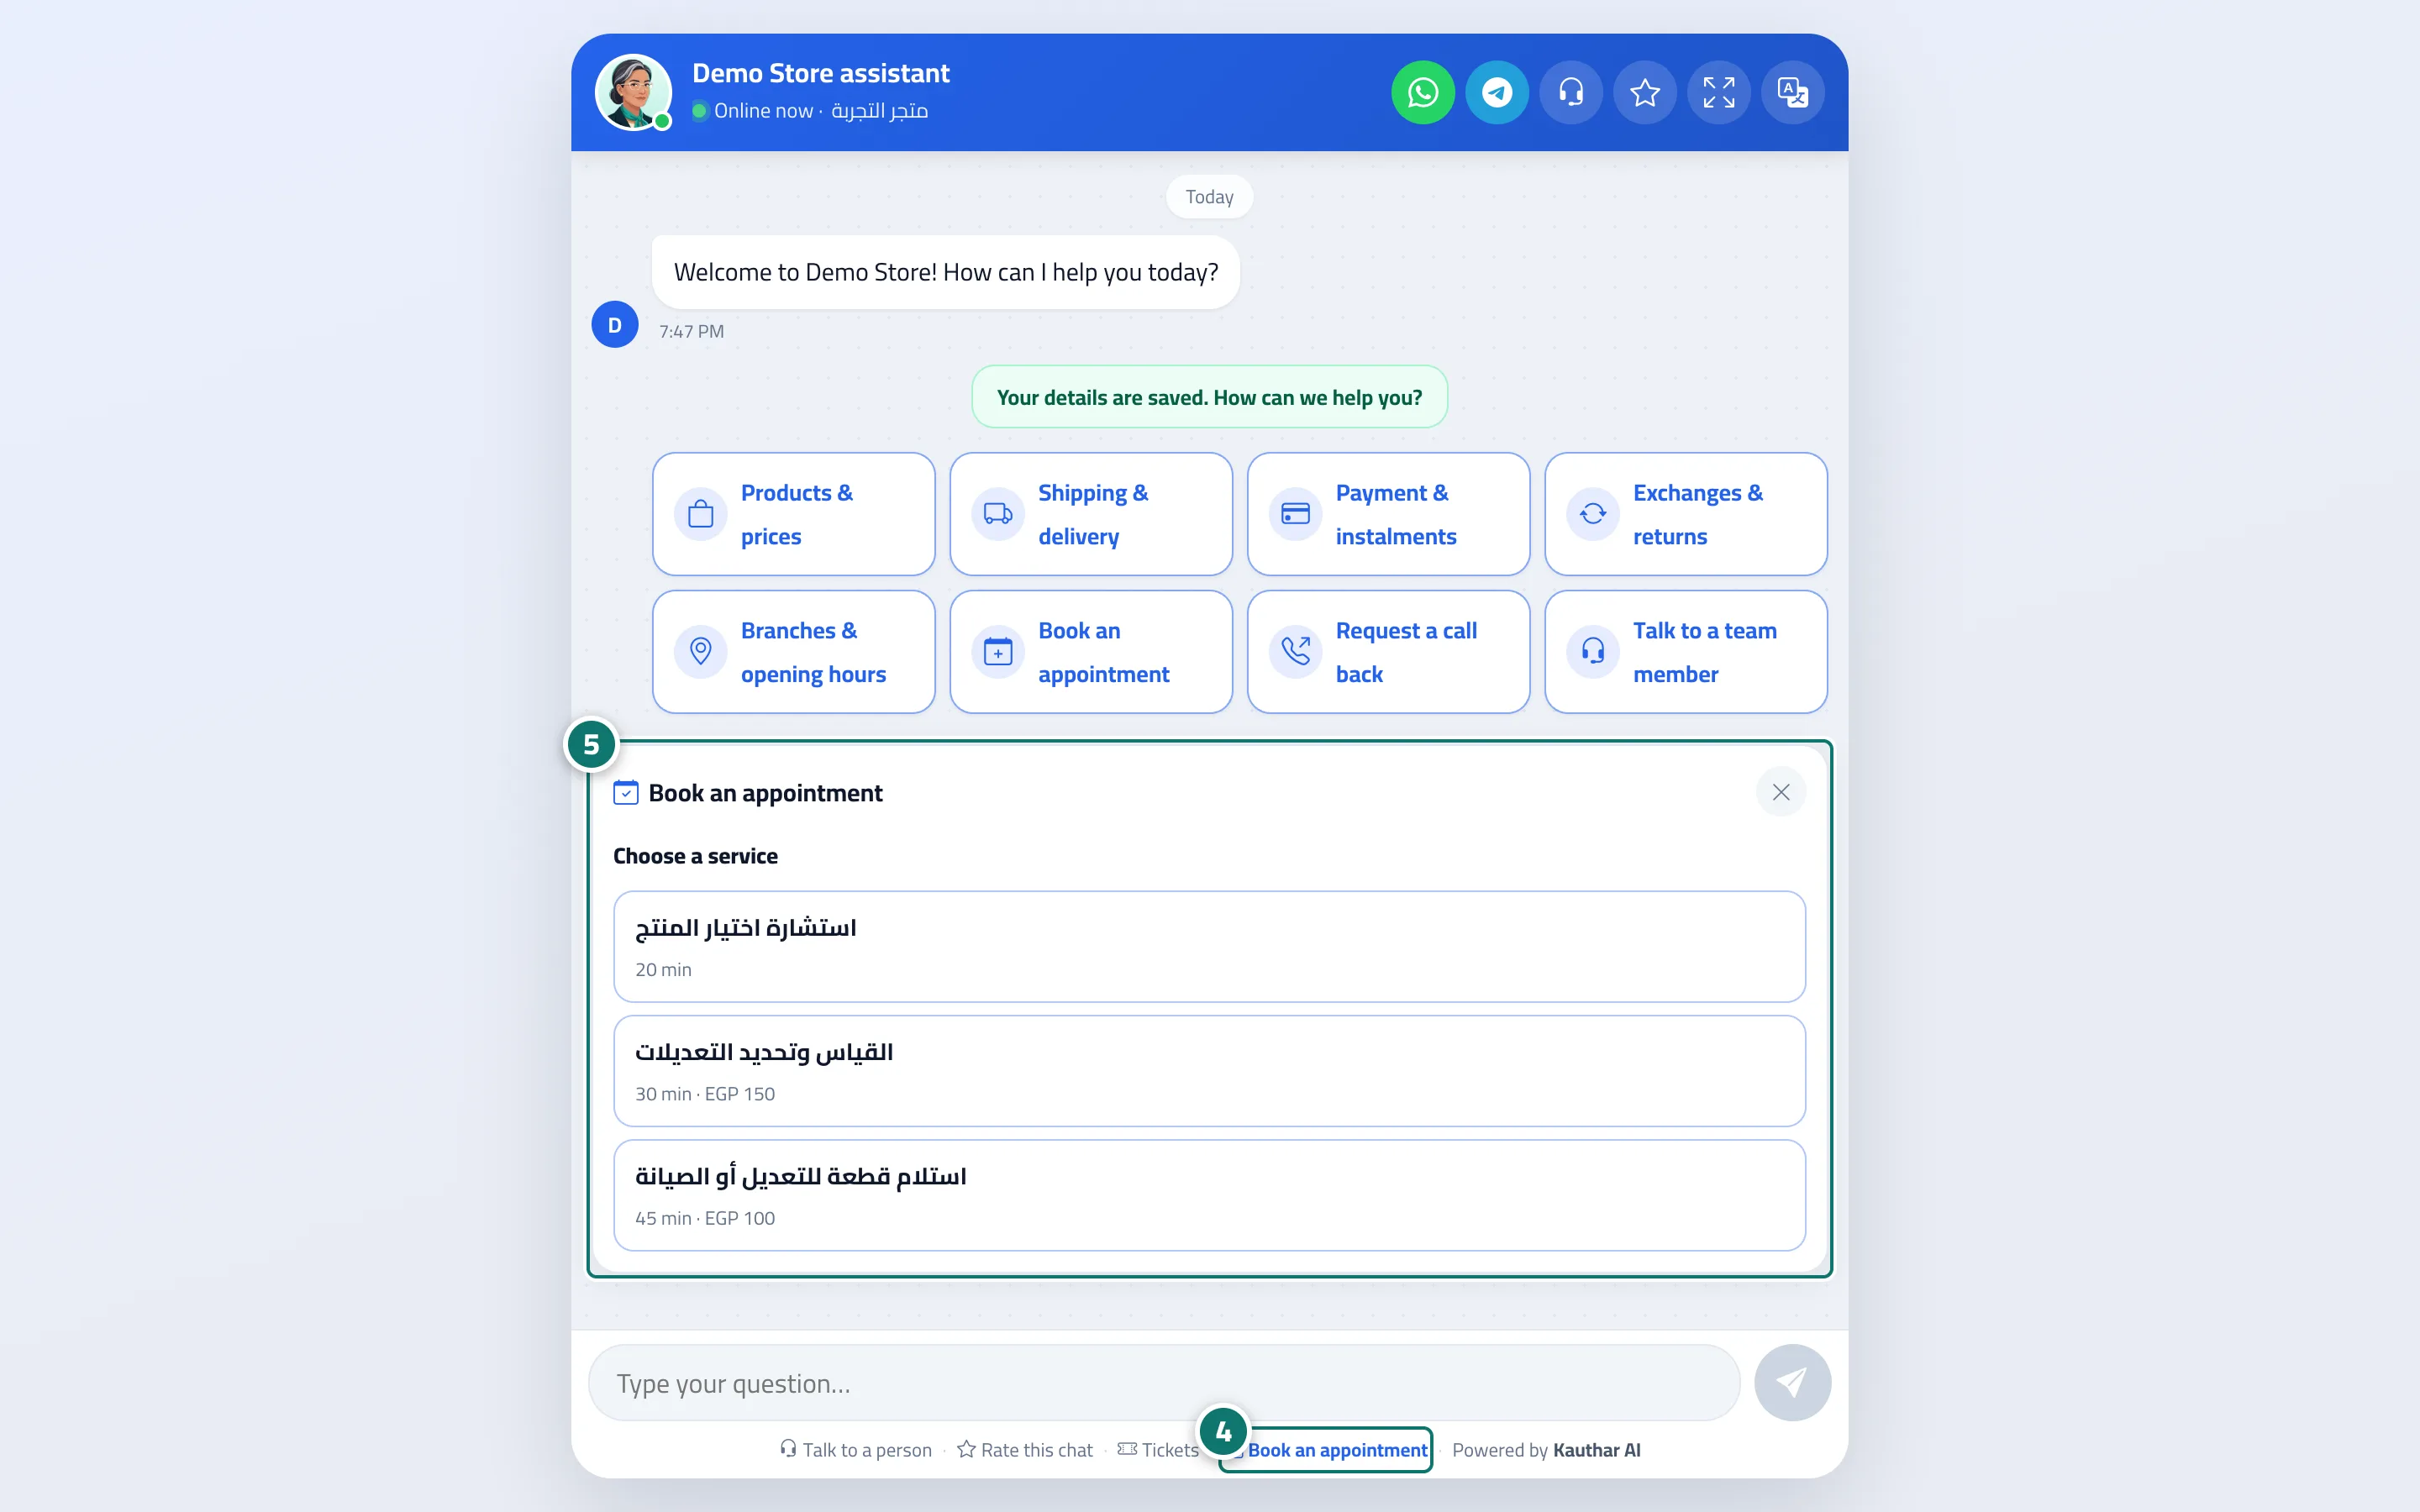
- The customer taps the button in the menu or the «Book an appointment» link at the bottom of the chat window. Number 4 on the picture
- They choose the service, provider, day and time with buttons, then enter their name and phone number and press «Confirm booking». Number 5 on the picture