
Conversations et support · Bulk ticket actions
How do I assign several tickets to one agent at once?
Select several tickets and change their status or priority, assign them to an agent or department, or merge them — in one click.
Pour qui : Propriétaire et responsable · Membres de l'équipe
Où : Sidebar → Support desk → Tickets
Étapes
- Tick the boxes next to the tickets you want, or the «Select all» box in the table header to select the whole page.
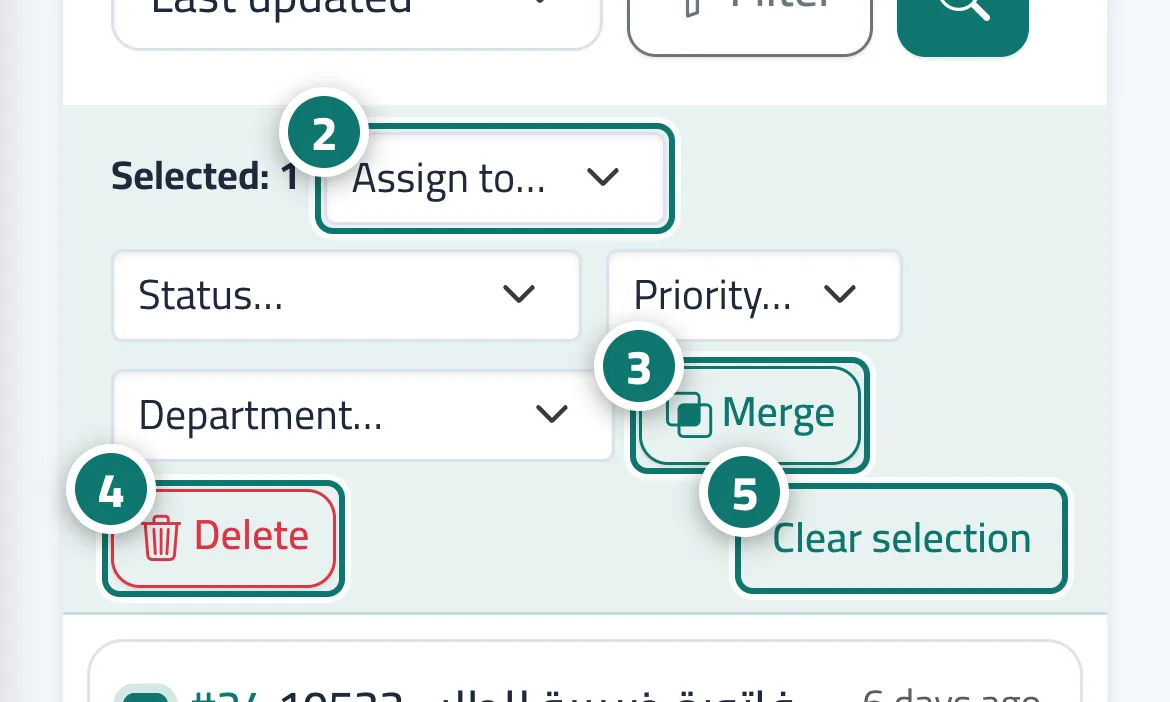
- From the bar that appears, choose «Assign to…», «Status…», «Priority…» or «Department…»; the action is applied immediately. Numéro 2 sur l’image
- To merge, press «Merge» and enter the number of the main ticket that the others will be combined into. Numéro 3 sur l’image
- To delete, press «Delete» and confirm; the tickets move to Trash. Numéro 4 sur l’image
- Press «Clear selection» to deselect. Numéro 5 sur l’image
Étapes
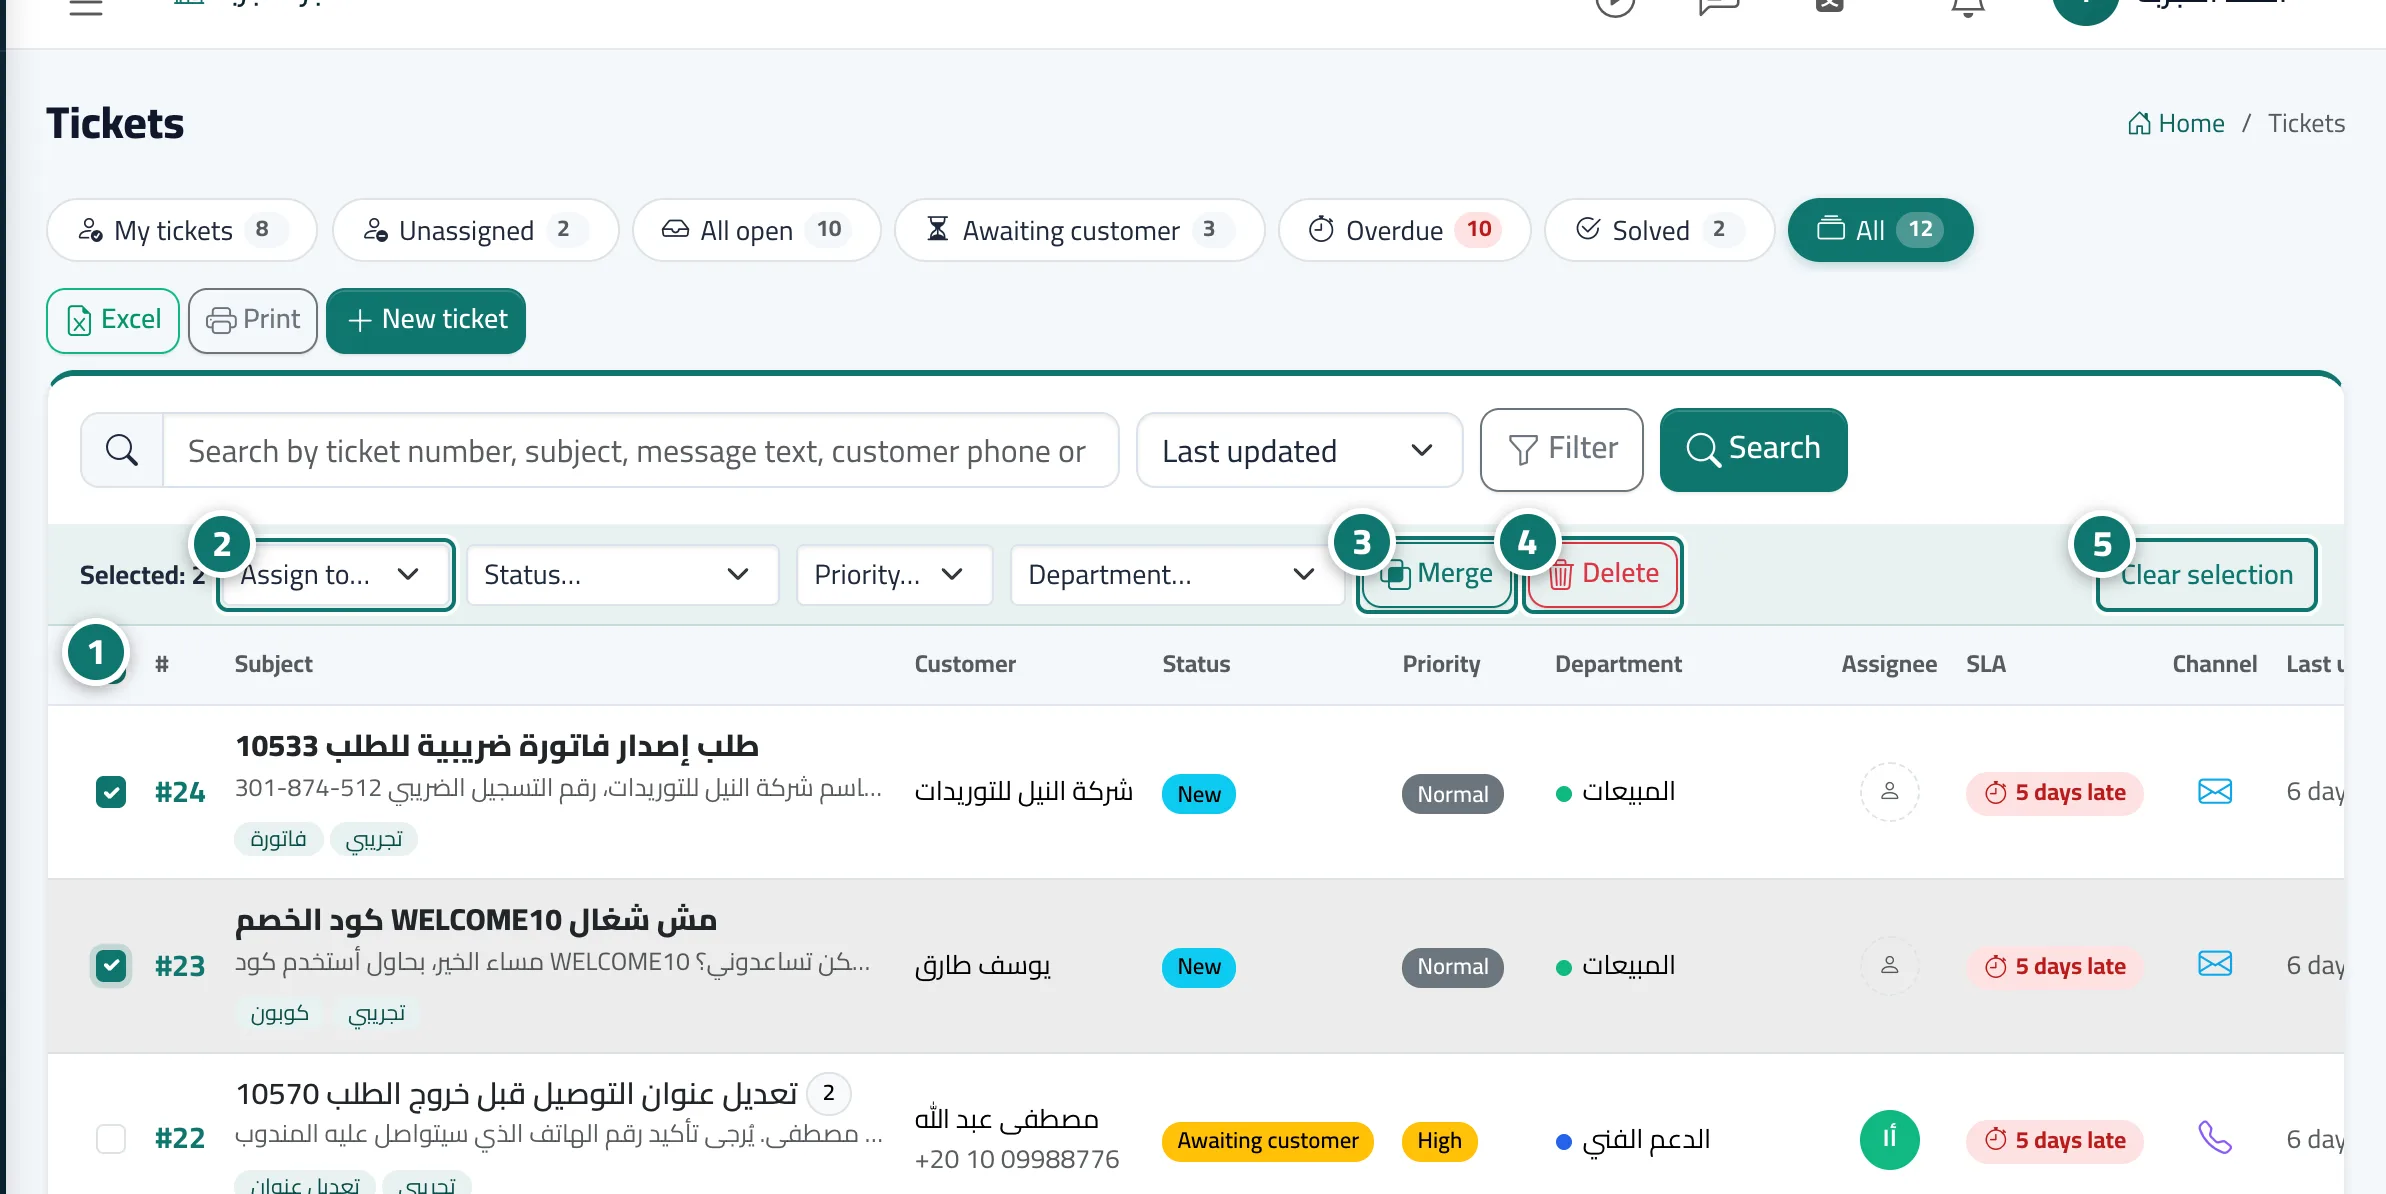
- Tick the boxes next to the tickets you want, or the «Select all» box in the table header to select the whole page. Numéro 1 sur l’image
- From the bar that appears, choose «Assign to…», «Status…», «Priority…» or «Department…»; the action is applied immediately. Numéro 2 sur l’image
- To merge, press «Merge» and enter the number of the main ticket that the others will be combined into. Numéro 3 sur l’image
- To delete, press «Delete» and confirm; the tickets move to Trash. Numéro 4 sur l’image
- Press «Clear selection» to deselect. Numéro 5 sur l’image