
Bulk ticket actions
Select several tickets and change their status or priority, assign them to an agent or department, or merge them — in one click.
Vue d’ensemble#
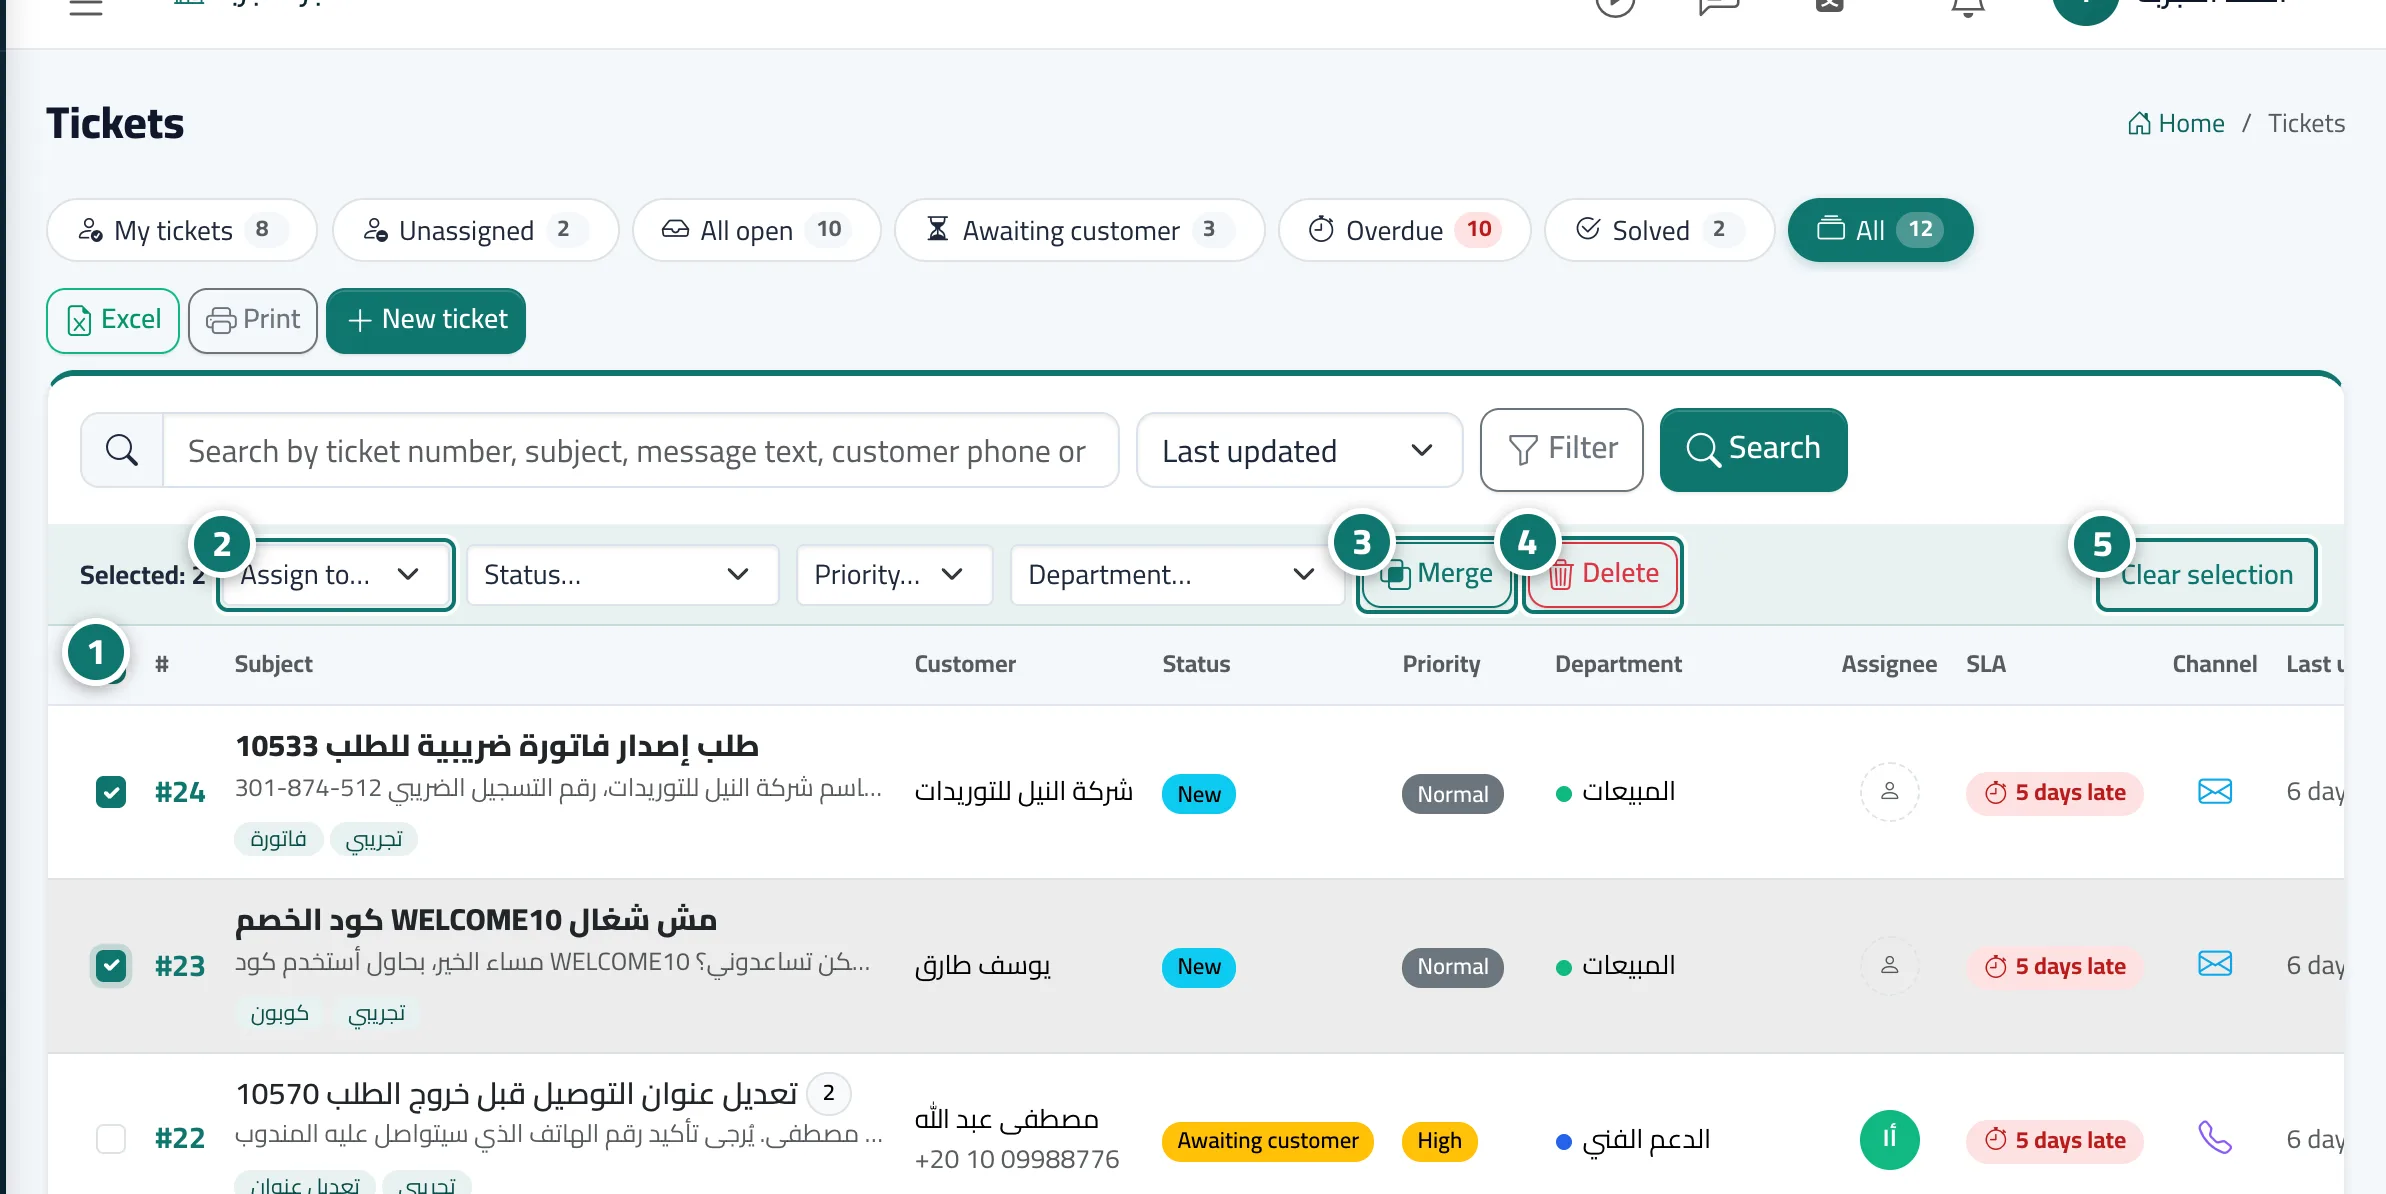
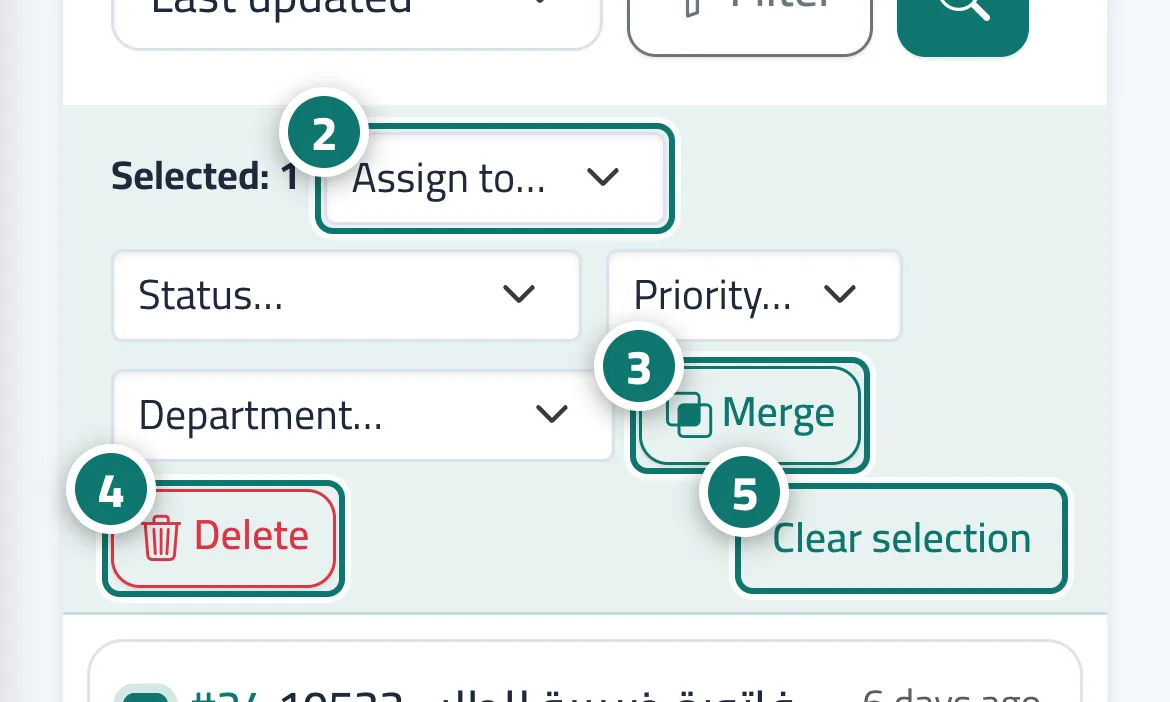
When you tick one or more tickets in the list, a Selected: N bar appears with every bulk action: Assign to…, Status…, Priority…, Department…, Merge and Delete. It is handy after an ad campaign or a general problem (such as a shipping delay) that brings in many similar complaints.
- Pour qui ?
- Business owner / manager / agent
- Où le trouver ?
- Sidebar → Support desk → Tickets
Pas à pas#
- Tick the boxes next to the tickets you want, or the Select all box in the table header to select the whole page.
- From the bar that appears, choose Assign to…, Status…, Priority… or Department…; the action is applied immediately.
- To merge, press Merge and enter the number of the main ticket that the others will be combined into.
- To delete, press Delete and confirm; the tickets move to Trash.
- Press Clear selection to deselect.
Astuces#
Bon à savoir#
Questions fréquentes#
I deleted tickets by mistake — how do I get them back?
Open Trash in the sidebar and press Restore next to each ticket.
What exactly does a bulk merge do?
The messages of all selected tickets move into the main ticket whose number you entered; the selected tickets are closed and show Merged into ticket #number.
Does an agent know when I assign tickets to them?
Yes. They get a Ticket #… was assigned to you alert in the notification bell, and a notification on their phone if they have turned notifications on.