
Mail labels and their automatic rules
Create coloured labels (such as «Key clients» or «Suppliers») to group each set of conversations, and add a rule so Kauthar puts the label on every new email that matches.
Overview#
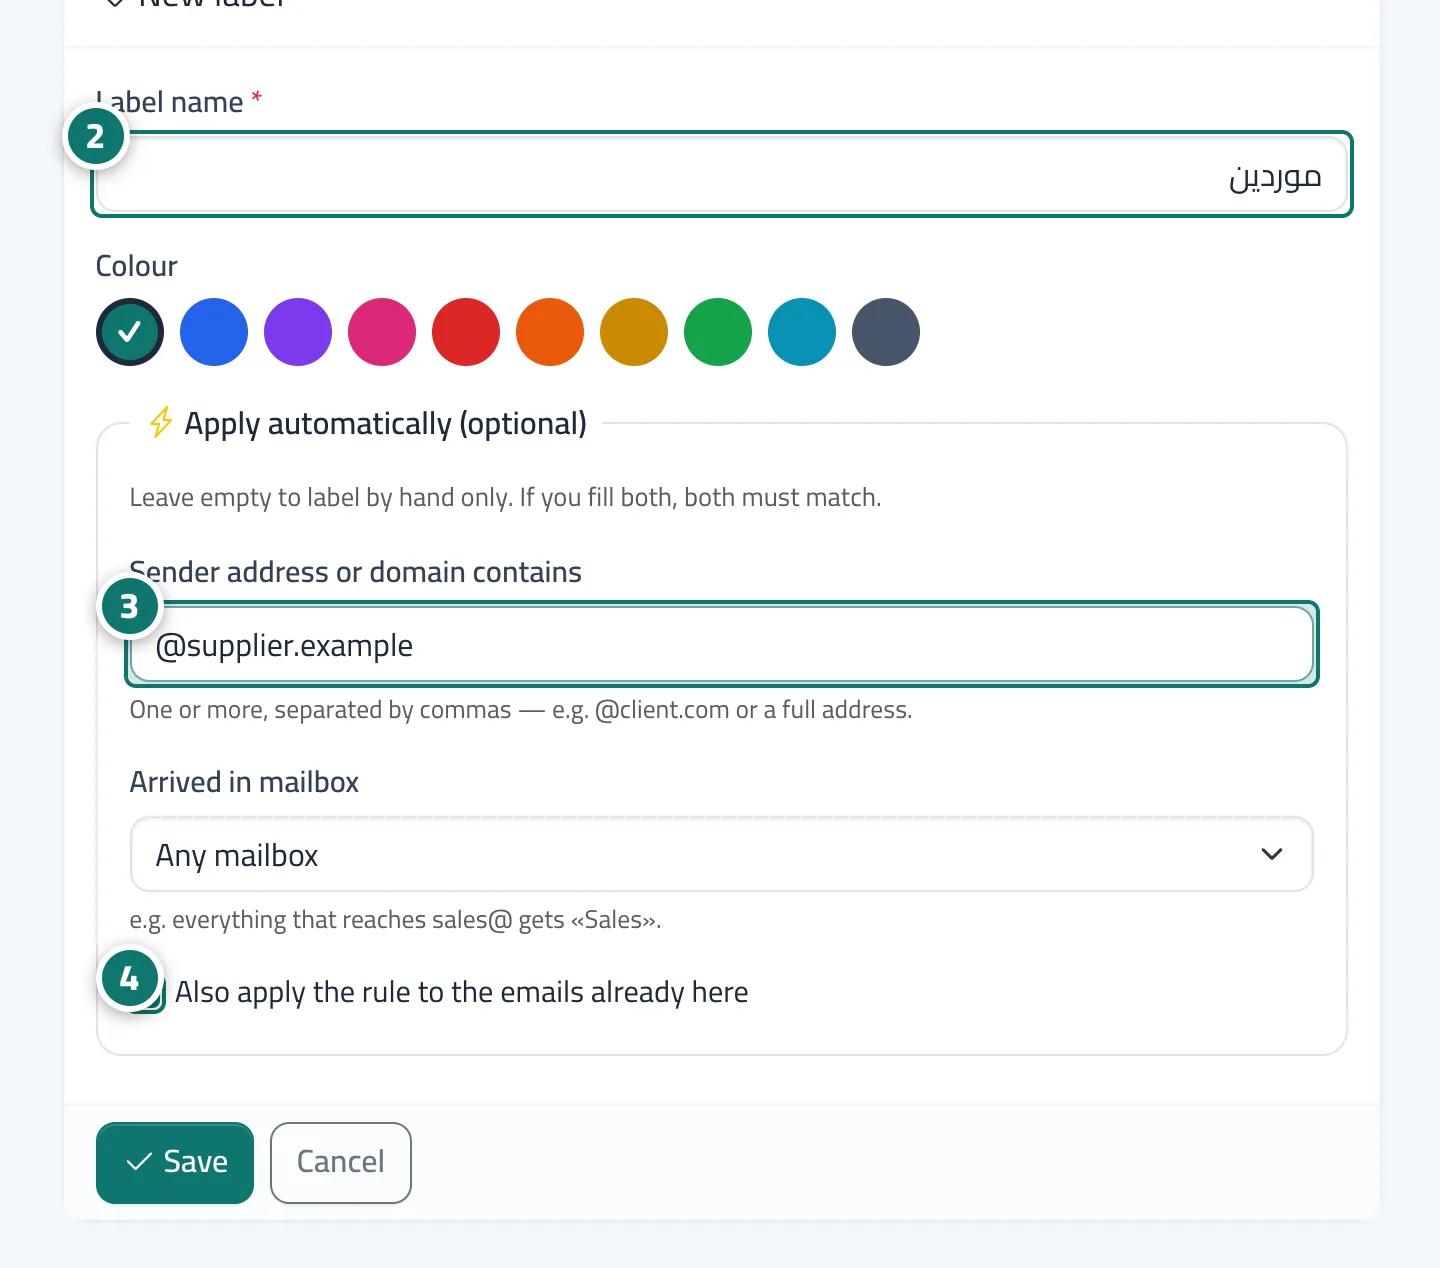
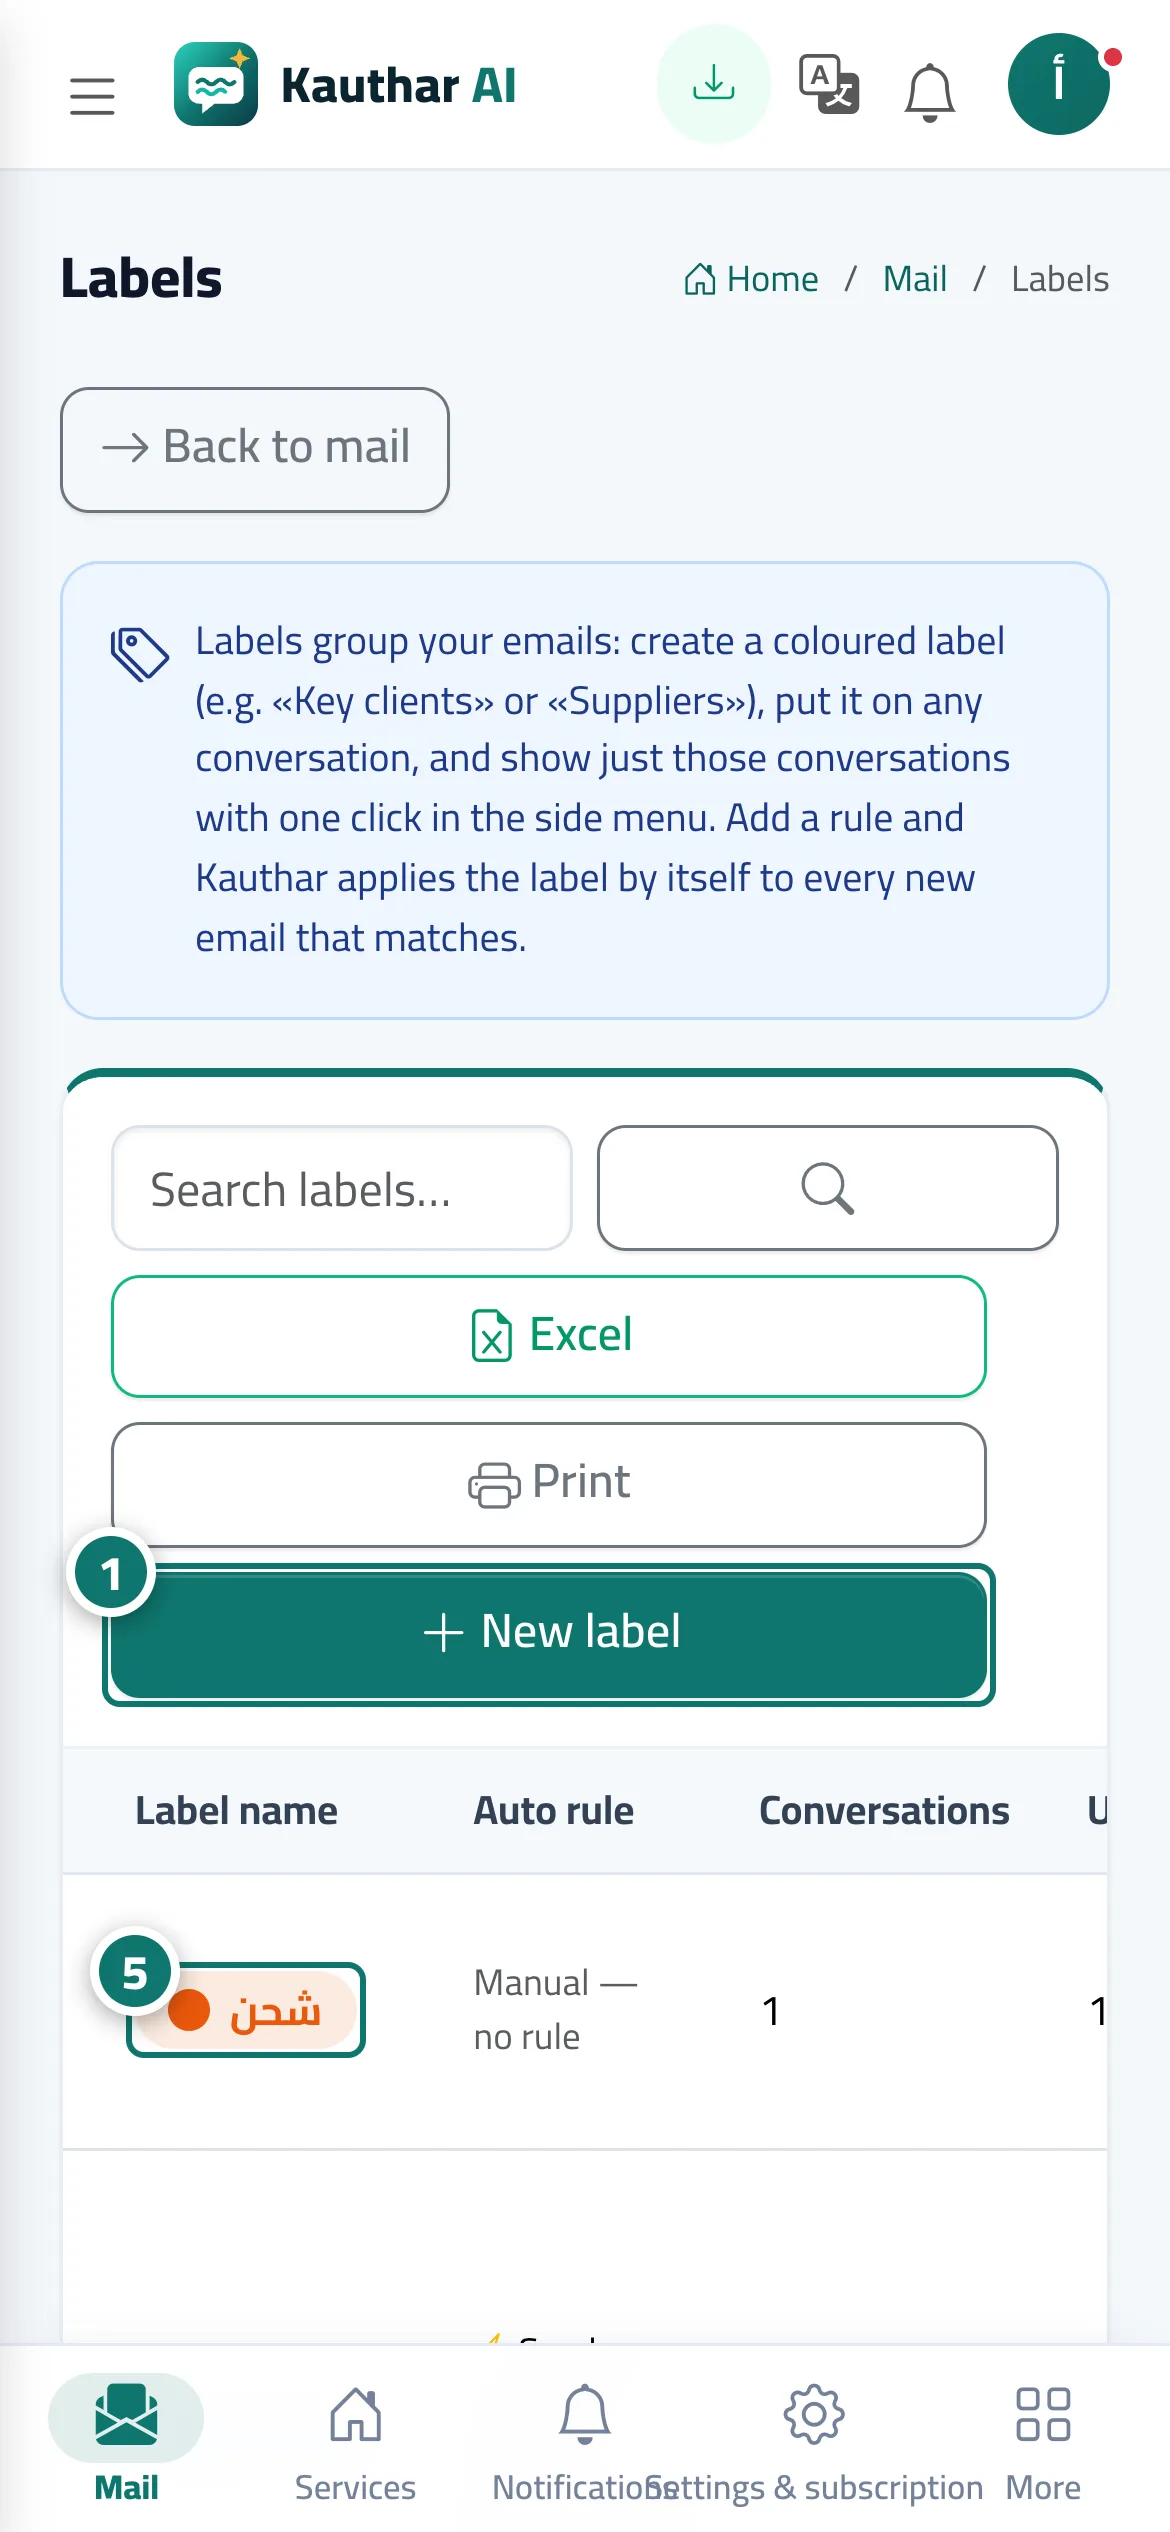
The Labels page lists every label with its colour, its rule and how many conversations (and unread ones) carry it, with search, print and Excel. Each label has a name (up to 30 characters) and a colour, plus Apply automatically (optional) with two conditions: Sender address or domain contains (one or more, separated by commas — e.g. @client.com) and Arrived in mailbox (a specific mailbox); when both are filled, both must match. The rule runs on every new email as it arrives, and can be run over the emails already there with Apply to existing or when saving. Labels appear in the mail side menu, and clicking one shows only its conversations; you can also put a label on any conversation by hand, from inside it or with multi-select.
- Who can use it
- Everyone with the Mail permission sees labels · creating, editing and deleting need the edit permission
- Where to find it
- Mail → the Labels section of the mail side menu → the gear (Manage labels), or Tools → Labels
Step by step#
- Open Labels and click New label.
- Type the label name and pick its colour.
- For automatic labelling, enter an address or domain in Sender address or domain contains and/or pick a mailbox in Arrived in mailbox (leave both empty for a manual label).
- Keep Also apply the rule to the emails already here ticked if you want current emails labelled too, then click Save.
- Click the label name (in the list or in the mail side menu) to show only its conversations.
Tips#
Good to know#
Frequently asked questions#
Is a rule applied to older emails automatically?
No, only to new emails. For the existing ones, tick the apply option when saving or click Apply to existing on the label's row.